 Denys Mitchell
Key Takeaways
- Rubber supply hoses on an Asko washer are due for replacement every five years, and stainless braided hoses about every ten.
- A hose can look fine while its inner layer is delaminating, so the date matters more than the look.
- Turn off both valves, catch the water, unscrew by hand, clean the inlet screens and fit new hoses hand-tight, then snug with pliers without overtightening.
- Stainless braided hoses are the recommended upgrade and start from $24 a pair.
- A corroded wall valve or one that will not shut off completely is a job for a licensed plumber first.
The Bottom Line
Replace rubber hoses every five years, with a stainless braided pair, and check the connections as the washer fills. If the wall valve will not shut off, call a plumber before touching the hoses.
The two hoses that bring water to a washing machine are under mains pressure whenever the taps are open, which is most of the time. When one bursts, the machine's own protection cannot help, because the water never enters the machine. Asko washer supply hose replacement is one of the cheapest ways to prevent a serious flood, and this guide covers how to tell when a hose has had its time, how to change it safely and when the job belongs to a plumber. For the wider picture, see our guide on Asko water safety.
| Sign | What it means | Action |
|---|---|---|
| Rubber hose over five years old | It is due, even if it looks fine | Replace it |
| Braided hose over ten years old | Past the usual service life | Replace it |
| Blistering, cracking or discoloration | The rubber is failing | Replace it now |
| Rust at an end fitting | Corrosion at the connection | Replace it, check the valve |
| Moisture at the wall valve | A leaking connection or valve | Check, call a plumber if it persists |
How Often Should Asko Washer Supply Hoses Be Replaced?
Every five years for standard rubber hoses, and about every ten for stainless braided ones. Those are the intervals in the Asko supply hose notice on this site, and our water safety guide gives the same five years for rubber. Treat the date as the rule, because the age of a hose tells you more than its appearance does.
Write the date on the hose, or on the wall behind the washer, the day you fit it. A hose of unknown age behind a washer you inherited with the house should be treated as over five years old.
How Can You Tell a Supply Hose Is Failing?
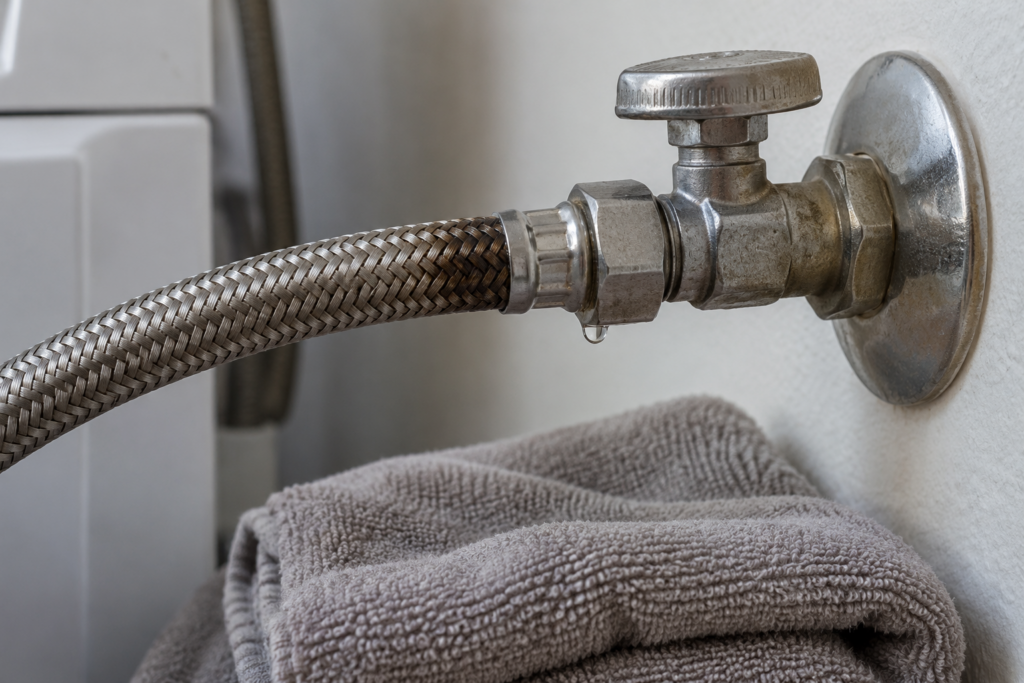
Not reliably by looking, and that is the problem. The notice says that standard rubber hoses degrade from the inside out, so a hose can look fine while its inner layer is delaminating, which creates a partial blockage or a weak point under pressure years before any crack shows on the outside. Visual inspection is still worth doing, but it cannot clear a hose that is old.
- Blistering or bulges. A swelling on the outside is a weak spot waiting to split.
- Cracking or discoloration. Both show that the rubber is aging.
- Rust or corrosion on the end fittings. It signals moisture at the connection.
- Dripping at the wall valve. The notice lists dripping or moisture around the connection as a warning sign.
- A kink mark along the run. A hose that has been kinked is weakened at that point.
How to Do an Asko Washer Supply Hose Replacement
It is a short job that needs only a towel, a tray and pliers. Do it when the machine has been idle for a while, and have a bucket to hand.
- Turn off both water valves. The hot and cold valves behind or beside the washer.
- Catch the residual water. Put a towel or a shallow tray under each connection.
- Unscrew the old hoses by hand. Counterclockwise, from both the wall valve and the washer inlet.
- Check the inlet screen. Look at the screen in each washer inlet for debris and clean it if necessary.
- Fit the new hoses hand-tight. Then snug each connection with pliers, but do not overtighten: the notice warns it can crack the inlet valve body.
- Open the valves and watch. Turn the water back on and inspect both connections for drips while the washer fills.
Check again after the first full cycle. A connection that is dry at the start can weep when it warms up under pressure.
Which Supply Hoses Should You Buy?
Stainless steel braided hoses, from the manufacturer or a compatible pair. The notice calls them a recommended upgrade for every Asko washer installation because of their burst resistance, and it gives a price from $24 a pair at authorized parts dealers. Compared with the cost of water damage to a floor, that is a small amount.
- Buy a pair. Replace the hot and the cold hose together, so that neither is left old.
- Check the length. A hose that is too short is pulled tight, and one that is too long kinks.
- Look at the fittings. Make sure each coupling matches the washer inlet and the wall valve.
When Should a Plumber or a Technician Do It?
When the wall valve is corroded or will not shut off completely, call a licensed plumber before you touch the hoses. The notice says so directly: a valve that does not close fully means water keeps flowing when you unscrew the hose. If the inlet valve screen is clogged or the solenoid feels sticky when the washer fills, it recommends a service call to inspect the whole water inlet system.
Slow filling and an E2 water fill timeout are the machine's own sign of an inlet problem, and a blocked screen or a pinched hose is the first thing to check. Our washer safety guide covers what else to watch.
What to Do If a Hose Bursts
Close the valves first, then deal with the water. The water safety guide says to close the tap and switch the machine off at the wall before anything else, and only then to look for the source. A hose that has burst can release a great deal of water in a short time, so speed matters more than tidiness.
- Shut both water valves. If a valve will not close, shut off the water at the main.
- Switch the washer off at the wall. Do this only if you can reach the outlet without standing in water.
- Move towels and furniture. Stop the water spreading to other rooms and lift anything valuable off the floor.
- Do not rerun the machine. Replace the hose and dry the area first.
- Tell your insurer. Take photographs of the hose and the damage before you clear up.
Habits That Keep a Washer From Flooding the House
- Close the taps when you are away. Hoses are only under pressure while the valves are open.
- Look behind the washer once a year. A glance at the hoses and the wall valves is quick.
- Consider a drain pan or a leak detector. This matters most on a wooden floor or an upstairs closet.
- Do not reset and rerun after a leak. The water that tripped the machine is still there.
The final price of any service work is confirmed after diagnosis on site, with a written estimate before work begins. Our washer maintenance guide fits the hose check into a yearly routine, and the preventive maintenance service covers it on a visit. For a fault, washer repair starts with a diagnosis. Schedule a visit or contact us with what you found behind the machine.